Baby Proofing for Renters: Removable No-Damage Solutions for Every Room

Renting with a baby is a puzzle that most parenting guides quietly ignore. The advice assumes you own your walls. You don’t. And that changes everything from the staircase gate to the dresser strap to the cabinet lock under the kitchen sink.
The good news: removable, no-damage baby proofing has gotten good. The products are better, the adhesives are stronger, and the solutions are more complete than they were even five years ago. In my experience, when a child starts pulling up on furniture in a rental with original plaster walls and a detail-oriented landlord, removable solutions become essential. What follows is what I learned.
Start With Documentation, Not Products
Before you install a single lock or strap, photograph every room. Every wall, every cabinet face, every floor. This takes twenty minutes and protects your security deposit more than anything else you’ll do.
The logic is simple: when you move out, you need to prove that any marks, scuffs, or residue existed before you arrived, or that your removable installations left nothing behind. A timestamped photo library is your evidence. Keep your product packaging and receipts in a folder, physical or digital. If a landlord claims damage, you want to show that the product you used was specifically designed for clean removal.
Do this before anything else. It costs nothing.
Testing Adhesive Products on Your Surfaces
Not all walls are the same, and adhesive-backed safety products know the difference. Flat latex paint, textured surfaces, wallpaper, and older oil-based paint all respond differently to removable strips. Some surfaces pull cleanly. Others take the finish with them.
My rule: always test in an inconspicuous spot first. Behind a door, inside a cabinet, low on a baseboard. Apply the product, press firmly for sixty seconds, let it cure for the manufacturer’s recommended time (usually 24–72 hours), then remove it at a 45-degree angle, slowly and steadily. If the surface holds, you’re clear to proceed.
Command strips and similar products are engineered to release cleanly when pulled at that 45-degree angle. The angle matters. Yanking straight out is how you take paint with you. Pull the tab down and away, slow and deliberate. I’ve used them on painted drywall, wood trim, and tile, and the only failure I had was on a wall with cheap flat paint that was already peeling at the edges. The strip didn’t cause the damage. It revealed it.
Test first. Document what you find. Move forward.


Gates for Doorways and Stairs
About 93,000 children under 5 are treated in U.S. emergency rooms each year for stair-related injuries (Nationwide Children’s Hospital analysis of CPSC NEISS data). That number is not an argument for panic. It is an argument for a gate.
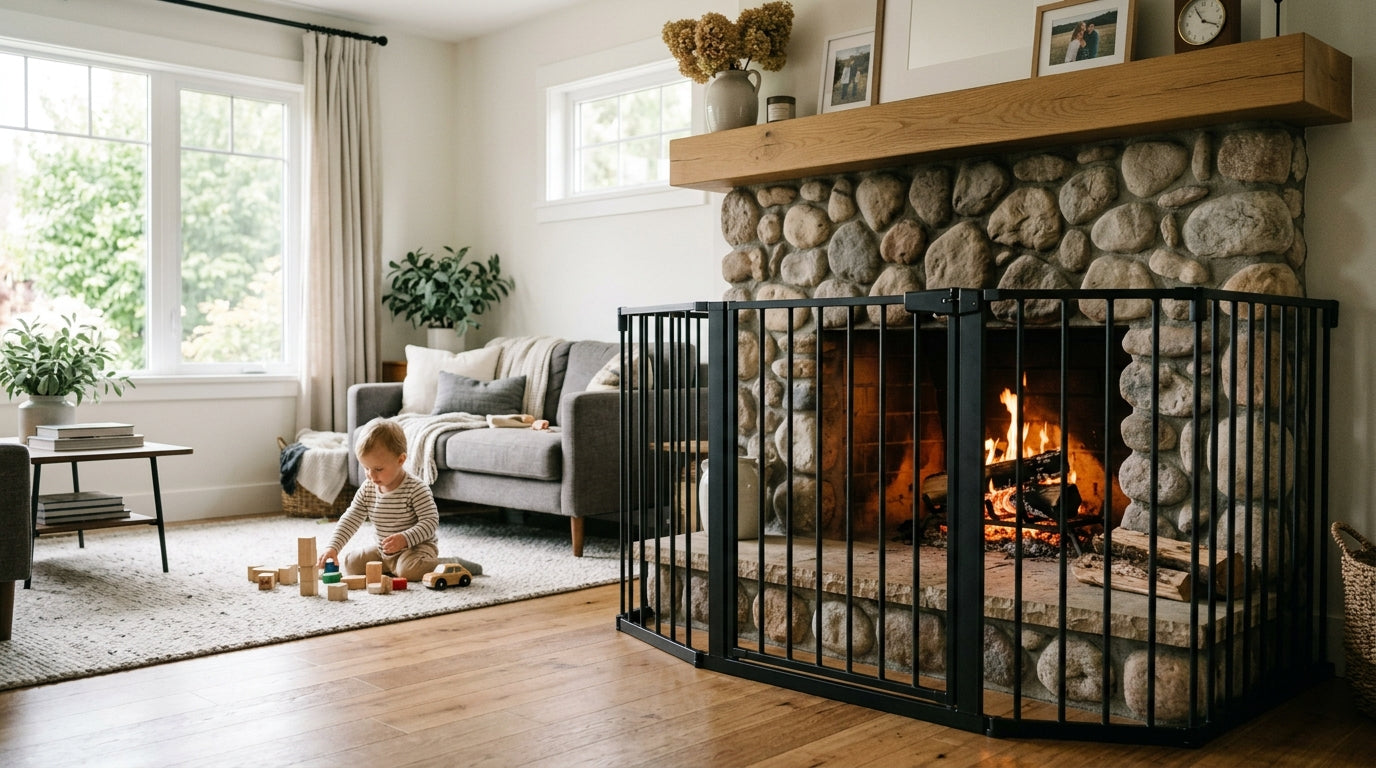
Tension-mounted gates are the renter’s answer. They use opposing pressure against the door frame or wall to stay in place, with no screws and no wall damage. They work well at the bottom of stairs and in doorways between rooms. They do not work at the top of stairs. At the top, you need a hardware-mounted gate, full stop. The pressure mechanism can give way if a child falls against it from above, and that is not a risk worth taking to protect a security deposit.
If your lease truly prohibits wall anchors, talk to your landlord. Most will allow small screw holes for a safety gate at the top of stairs, especially if you offer to patch and paint when you leave. Frame it as a liability conversation. Most landlords respond to that framing.
When you buy a tension gate, look for ASTM F1004 compliance. ASTM F1004 is the federal safety standard for expansion gates and expandable enclosures, made mandatory under 16 CFR Part 1239 effective in 2021. Any gate sold in the U.S. should meet this standard. Check the box.
Tension gates also need regular checking. As children grow, they push harder. A gate that held firm at 10 months may wobble at 18 months. Tighten it weekly. If it starts to feel loose no matter how much you tighten it, replace it.
Cabinet Locks That Leave No Trace
My younger daughter once emptied the entire under-sink cabinet in the time it took me to answer the doorbell. Cleaning supplies, dish soap, a box of trash bags, all of it on the kitchen floor. She was 14 months old. I had been meaning to install the cabinet locks for two weeks.
Don’t be me. Do it this week.
For renters, magnetic cabinet locks are the best option. They mount inside the cabinet door with adhesive or small screws (inside the cabinet, where no landlord will ever look), and they require a magnetic key held against the outside of the door to release. No visible hardware on the cabinet face. No residue. No damage to the wood or laminate.
Adhesive-only cabinet locks work on smooth cabinet surfaces and are removable. They hold well on painted wood and laminate. They struggle on textured or rough-finish cabinets. Test the adhesive first, same as you would on a wall.
One important note on magnetic locks: the key is a small, powerful magnet. Keep it out of reach. Store it on top of the refrigerator or in a high drawer. A toddler who finds the key has defeated the entire system.
Prioritize the cabinets that matter most: under the sink (cleaning products), any cabinet storing medications, and anything containing sharp objects. Everything else is a mess, not a hazard.
Anchoring Furniture Without Drilling
Half of all child tip-over deaths happen in the bedroom (CPSC Anchor It! campaign). The living and family room accounts for 22%. The bedroom is where dressers and chests dominate, and it is where the risk concentrates.
Renters have real options here. Heavy-duty adhesive furniture anchors, designed specifically for this purpose, attach to the back of the furniture piece and to the wall using industrial-strength adhesive rated to hold well above the weight of the furniture itself. These are not the same as picture-hanging strips. They are purpose-built for furniture restraint, and the packaging will specify the weight rating. Read it. Choose a product rated for at least several times the weight of the piece you’re securing.
Tension-based furniture straps are another option. These use a ratcheting strap between the furniture and a tension anchor that braces against the wall without penetrating it. They work best when the furniture is against a solid wall and the strap can be pulled taut.
Neither option is as secure as a lag bolt into a stud. I want to be honest about that. But either is meaningfully better than nothing, and nothing is what most renters end up with because they assume they have no options.
Anchor the dresser. Anchor the bookcase. Anchor anything your child can climb.
Outlet Protection That Doesn’t Create New Hazards
Traditional plastic plug covers, the kind you push into an outlet, are a choking hazard. Children can remove them, and a two-year-old who removes a plug cover and then tries to put it back is now interacting with an electrical outlet unsupervised. The CPSC guidance on outlet protection is clear: any outlet protection should prevent a child from inserting objects into electrical sockets. Sliding plate covers do this better.
Sliding outlet covers replace the existing outlet plate with a cover that has a spring-loaded sliding mechanism. To access the outlet, you slide the cover sideways while inserting the plug. A child cannot do this with one hand. They install with two small screws, and when you move out, you swap the original plate back on. Keep the original plates in a labeled bag in your junk drawer.
These are the one product where a small screw installation is worth it, because the original hardware goes back on when you leave and there is no visible damage.
Corner Guards and Edge Protection
Toddler head level is roughly 12–36 inches from the floor. That is exactly where coffee table corners, hearth edges, and entertainment center edges live. Corner guards and edge bumpers using 3M adhesive backing apply directly to these surfaces and absorb impact.
Clear foam guards are nearly invisible on light wood. They apply cleanly and, when removed at the correct angle, leave no residue on finished wood or stone. Apply them to every hard corner at that height range. The coffee table. The fireplace hearth. The bottom shelf of any bookcase your child can reach.
Replace them if they start to peel at the edges. A corner guard that’s half-detached is not protecting anyone.
Window Cords and Blind Safety
A dangling window blind cord is a strangulation risk for infants and toddlers. If your rental has corded blinds, you have two options: replace them with cordless blinds (many landlords will allow this, especially if you keep the originals and reinstall them when you leave), or use cord management devices to secure the cords out of reach.
Adhesive cord wind-ups and tension cord cleats mount to the window frame or wall with removable adhesive and keep cords wrapped and elevated. These are inexpensive and widely available. Use them on every corded blind in every room your child can access.
If you replace blinds with cordless versions, photograph the original blinds before removing them, store them carefully, and reinstall them when you move out. Label them by room.
Move-Out Removal Checklist
Stair Treads, Door Stops, and Floor Padding
Wooden stairs without carpet are beautiful and dangerous. Non-slip adhesive stair treads apply directly to the tread surface and provide grip for small feet and crawling knees. They are removable without damaging the wood finish when lifted carefully and at room temperature. Apply them to every tread your child can reach.
Adhesive door stops and door pinch guards prevent finger injuries from doors swinging shut. Foam pinch guards that drape over the top of the door are entirely damage-free. Adhesive door stops that hold a door open work on any floor surface and leave no marks on wood or tile when removed correctly.
Soft play mats with non-slip backing create padded zones near hard flooring. They don’t require any adhesive at all. They stay in place through friction and weight. Use them in the main play area, near the coffee table, and anywhere your child is learning to walk.
The Move-Out Checklist
When the time comes to move, removal is as important as installation. Work through each product category:
- Remove adhesive products at 45°F, slowly, at room temperature. Cold adhesive tears. Warm it gently with a hair dryer on low if needed.
- Swap original outlet plates back in. Dispose of the sliding covers or take them with you.
- Reinstall original blinds if you replaced them.
- Photograph every surface after removal, in the same sequence as your move-in photos.
Compare your move-in and move-out photos side by side before handing over the keys. If there’s a discrepancy, you want to catch it before your landlord does, and address it yourself. A small can of touch-up paint costs four dollars and is worth having on hand.
Renting with a young child is manageable. The constraints are real, but the solutions are solid. Every room in your home can be meaningfully safer without a single permanent hole in the wall.