Top of Stairs Baby Gate Installation: Hardware Mount Best Practices

About 93,000 children under 5 are treated in U.S. emergency rooms each year for stair-related injuries, according to a Nationwide Children’s Hospital analysis of CPSC NEISS data. That works out to roughly one child every six minutes. If you have a crawler or a new walker in your house, that number lands differently than it does in the abstract.
A baby gate helps. But only if it’s the right kind, mounted the right way, in the right place. At the top of stairs, the margin for error is zero. A gate that shifts, flexes, or pops free under a child’s weight isn’t a safety device. It’s a false sense of security bolted to your wall.
Why Hardware Mounting Is Non-Negotiable at the Top of Stairs
Pressure-mounted gates work by wedging against two walls with tension. That tension is enough to stop a toddler from wandering into a room. It is not enough to stop a toddler from falling into a gate at the top of a staircase.
When a child falls against a pressure-mounted gate, the force is outward and downward simultaneously. Pressure mounts resist lateral pressure reasonably well. They do not resist that combined load. The gate can shift, the rubber feet can slip, and the whole assembly can give way. At the top of stairs, "give way" means your child goes down the staircase.
ASTM F1004 is the federal safety standard for expansion gates and expandable enclosures, made mandatory under 16 CFR Part 1239 (effective 2021). That standard requires that gates intended for stair top use be hardware-mounted. The gate packaging should say explicitly that it’s approved for top-of-stair installation. If it doesn’t say that, don’t use it there.
Hardware-mounted gates use screws driven into wall studs or solid structural posts. The gate becomes part of the wall. That’s the only acceptable configuration for this location.
Finding Your Studs Before You Touch a Drill
Drywall alone will not hold a gate under load. The screws will pull through. In my experience, this happens more often than it should, and it’s exactly as alarming as it sounds.
Standard wall framing places studs 16 inches apart, center to center, though 24-inch spacing exists in some construction. Use a stud finder, move it slowly across the wall, and mark both edges of each stud with painter’s tape. The center of the stud is between those marks. That’s where your fasteners go.
If your stairwell sits between a wall and a banister post, the post side requires separate attention. The post must be solid wood or metal, and your fasteners need to penetrate at least 1.5 inches into the structural material. Hollow newel posts, decorative posts, and posts that are attached only at the base are not adequate anchor points. If you’re unsure, probe with a finish nail before committing to your gate hardware.
Mark your stud locations clearly. Measure twice before drilling anything.


Hinge Side, Latch Side: Getting the Orientation Right
This detail gets skipped in a lot of installation guides, and it matters.
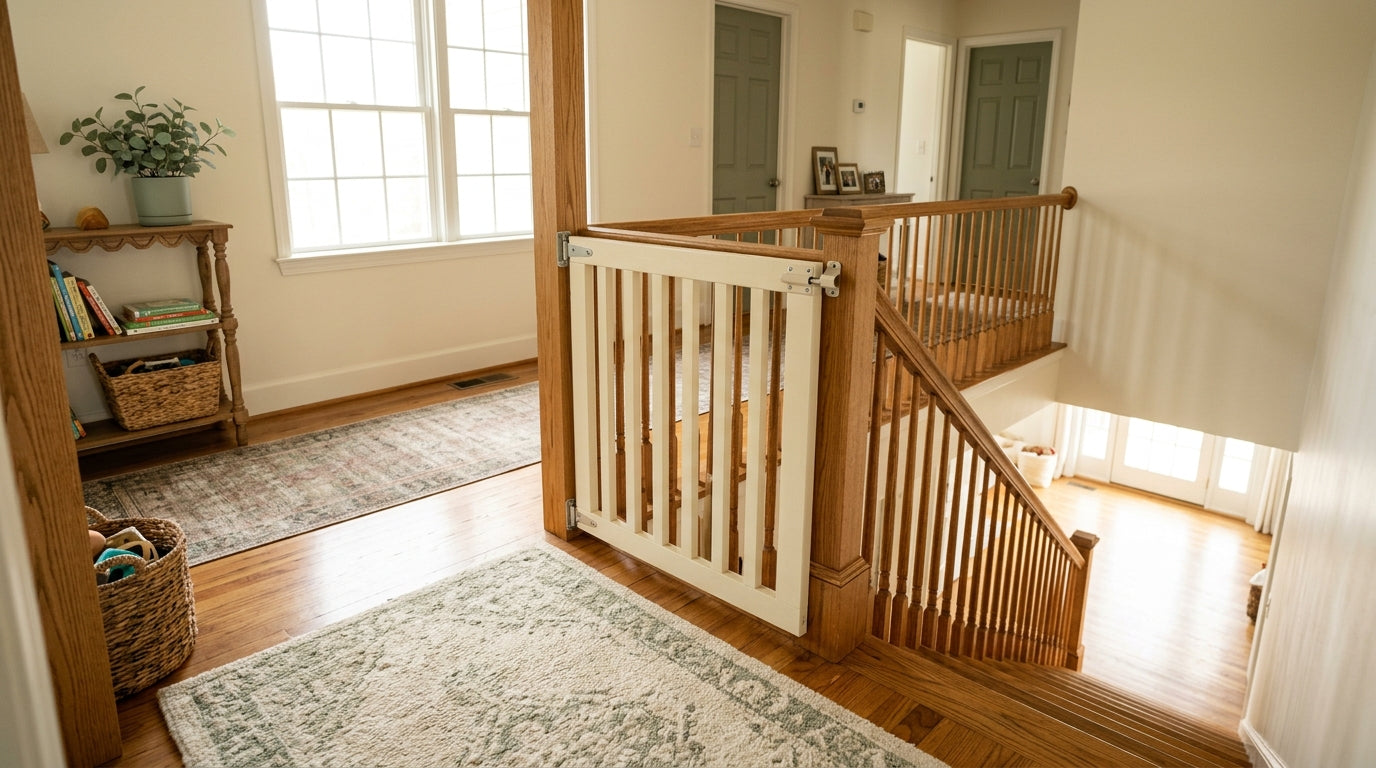
The hinge side of the gate must face the stairs. The latch side must face the landing. Here’s why: if a child leans or falls against the gate from the landing side, the force pushes toward the hinge. Hinges resist that direction well. If the gate were reversed, the same force would push against the latch mechanism, which is the weaker point of the assembly.
There’s a second reason. A gate hinged toward the stairs cannot swing open toward the stairwell. It can only open away from the stairs, toward the landing. That means even if the latch fails, the gate swings in the safe direction. A reversed gate could swing open over the top stair. That’s a fall waiting to happen.
Check your gate’s documentation to confirm which side is the hinge side. Most gates are labeled. Install accordingly, every time.
Height, Clearance, and the 4.25-Inch Rule
Two measurements govern whether your gate is doing its job once it’s up.
First: the top of the gate should sit at least 22 inches above the stair tread directly below it. This prevents a child from getting enough leverage to climb over. My older daughter was scaling furniture at 22 months, and I promise you the height requirement is not theoretical.
Second: the gap between the bottom of the gate and the floor or stair tread must be no wider than 4.25 inches. A child’s body can pass through surprisingly small openings, but the critical concern is head entrapment. A gap wider than 4.25 inches creates a risk that a child’s head could become trapped. The same principle applies to gaps between the gate frame and the wall or banister on either side. If those side gaps exceed 4.25 inches, they need to be closed with extension panels or blocking.
The crib slat standard from CPSC (16 CFR 1219) sets a 2 3/8-inch maximum for slat spacing, which is more restrictive than the 4.25-inch gap standard for gates. Some gate manufacturers apply the tighter crib standard to their vertical slat spacing as well. That’s a good thing. Check the slat spacing on any gate you’re considering.
Fasteners: What to Use and What to Skip
Use corrosion-resistant screws or bolts. Most gates ship with hardware, but it’s worth checking the specifications. The fasteners should be rated for the gate’s stated weight capacity, with meaningful margin beyond that.
Do not use nails. Nails can loosen over time through vibration and temperature cycling. A screw that backs out slightly is still in the wall. A nail that works loose can pull free entirely.
Drive fasteners into studs, not just drywall. If the gate’s mounting bracket doesn’t align with a stud, use the extension kit that comes with the gate to shift the bracket until it does. Do not improvise with toggle bolts or drywall anchors at the top of stairs. Those solutions are adequate for picture frames. They are not adequate for a barrier that may absorb a falling child’s full body weight.
Every mounting point on the gate frame should be fastened. Gates are designed to distribute force across multiple anchor points. Skipping one because it’s inconvenient defeats that design.
Testing the Installation Before You Walk Away
Before you consider the job done, test it. Not gently. Firmly.
Apply downward pressure on the top rail. Apply outward pressure toward the stairwell. Push sideways. The gate should not shift, flex noticeably, or separate from the wall at any anchor point. If it moves, something is wrong. Find the loose fastener, find the missed stud, find the problem and fix it before your child finds it for you.
Test the latch. Open and close the gate ten times. It should latch automatically every time the gate swings closed. Per AAP guidance, caregivers need to be able to open the gate quickly in an emergency. The latch mechanism should be operable by an adult in seconds, but not by a toddler. Most top-of-stair gates use a dual-action latch that requires two simultaneous movements. That’s the right design. If yours requires a key or a multi-step process that you have to think about, reconsider the gate.
Check that the gate swings fully open without binding on carpet, a threshold, or the stair nosing.
Handling Angled Walls and Banister Configurations
Standard gates assume parallel, plumb walls. Stairwells often don’t cooperate.
If your wall angles away from plumb, or if one side of your opening is a banister rather than a wall, you need the right hardware for the actual situation. Most gate manufacturers sell angled mounting kits and banister clamp adapters. Use them. Do not force a standard bracket against an angled surface and assume the screws will compensate. They won’t. The bracket will sit at an angle, the gate will hang crooked, and the load distribution will be wrong.
When mounting to a banister post, the clamp adapter must grip the post firmly and the through-bolts must penetrate at least 1.5 inches into solid material. Tighten the hardware fully. Then test it the same way you’d test a wall mount: firm pressure in multiple directions before you trust it.
If your opening is unusually wide, use the gate’s extension panels rather than stretching the gate beyond its rated width. Every gate has a maximum span. Exceeding it reduces the structural integrity of the whole assembly.
Monthly Gate Maintenance Checklist
Ongoing Maintenance: Monthly Takes Two Minutes
Installation is not a one-time event. Temperature changes cause wood framing to expand and contract. Daily use vibrates fasteners. Over time, screws back out.
Check every fastener monthly. Use the appropriate screwdriver or wrench and snug anything that has loosened. It takes two minutes. My rule is the first of every month, same time I check the batteries in our smoke detectors.
Also check the gate’s hardware: hinges, latch mechanism, and any adjustment screws on the mounting brackets. Hinges in particular can develop play over time. A gate that wobbles on its hinges is telling you something needs attention.
If you repaint the wall near the gate, check that paint hasn’t gummed up the latch mechanism. It happens more often than you’d think.
What a Solid Installation Looks Like
When everything is done correctly, the gate feels like part of the wall. There’s no wobble when you push on it. The latch clicks shut every time without you thinking about it. The gap at the bottom is tight. The side gaps are closed. The hinge is toward the stairs.
You open it with one hand, step through, close it behind you, and hear the latch engage. That sound becomes automatic. When you stop hearing it, you go back and close the gate properly.
That’s the standard. Hardware into studs, correct orientation, verified clearances, tested under load, checked monthly. A gate that meets all of those conditions is doing its job. One that misses any of them is a liability you haven’t discovered yet.