Baby Proofing Without Drilling: Adhesive Pressure-Mount and Removable Products

Renting an apartment or living in a leased home doesn’t mean you get to skip babyproofing. It means you have to be smarter about it.
For a lot of parents, the fear of losing a security deposit is real enough that they delay safety measures, or skip them entirely. That’s a dangerous trade-off. The good news is that adhesive and pressure-mount products have improved enough that you can protect most of the hazards in a typical home without touching a drill. But "no holes required" doesn’t mean "no standards required," and there are a few places where removable products cannot do the job. Knowing which is which matters.
We’ll focus on products that meet federal safety standards and the specific locations where removable solutions are effective, and where they aren’t.Pressure-Mount Gates: Where They Work and Where They Don’t
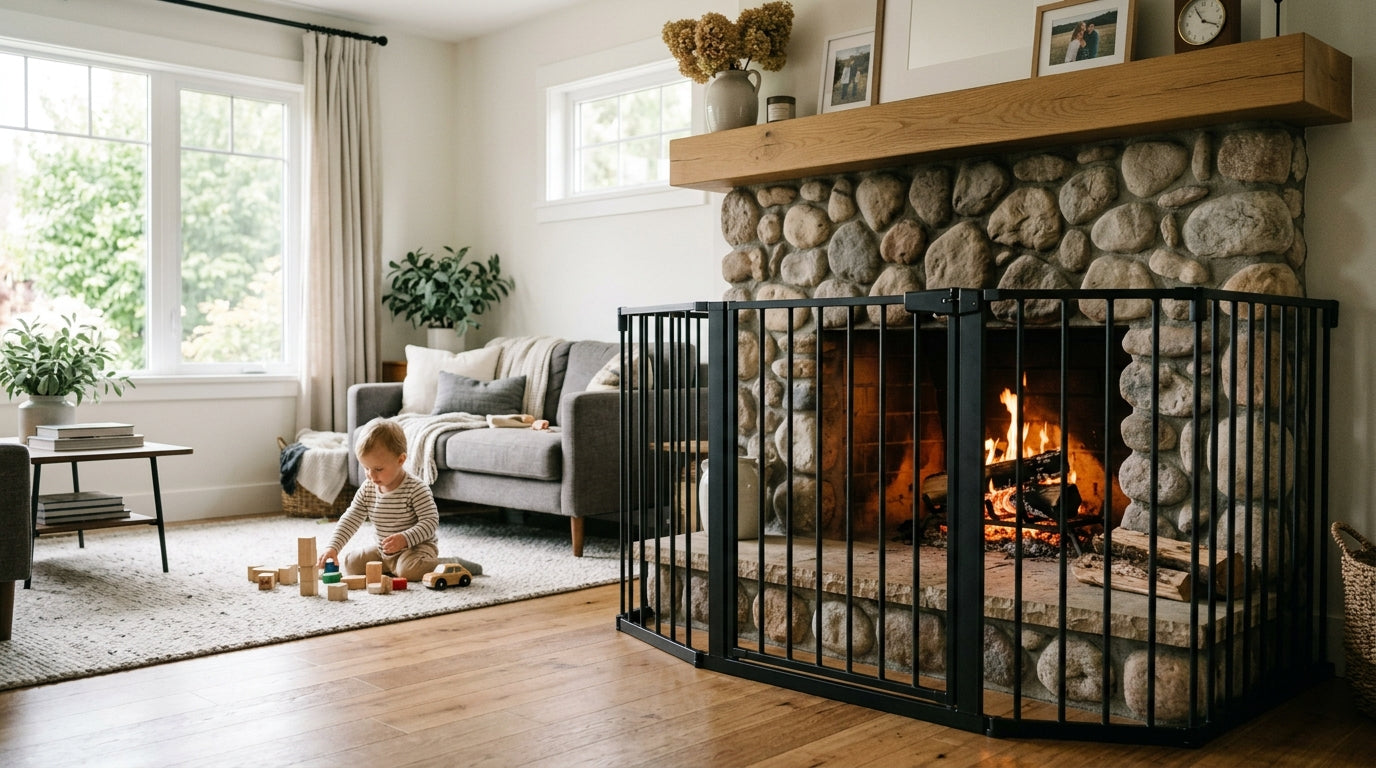
Pressure-mounted gates are the most visible no-drill option, and they’re legitimately effective in the right locations. They work by tensioning against two opposing surfaces, usually a doorframe or hallway walls, creating a friction hold that can stop a determined toddler.
ASTM F1004 is the federal safety standard for expansion gates and expandable enclosures, made mandatory under 16 CFR Part 1239 (effective 2021). Any gate you buy should carry that certification. It’s not optional, and it’s not a marketing label. Check the box.
Where pressure-mount gates belong: doorways between rooms, hallways, kitchen entrances. Where they do not belong: the top of any staircase. The CPSC is explicit on this. A pressure-mount gate at the top of stairs can be dislodged by a child pushing against it, and the fall risk is severe. According to Nationwide Children’s Hospital analysis of CPSC NEISS data, approximately 93,000 children under 5 are treated in U.S. emergency rooms annually for stair-related injuries. A hardware-mounted gate is the only acceptable option at the top of a flight of stairs, full stop.
If you’re renting and your landlord won’t allow drilling, have that conversation directly. Most landlords will agree to hardware mounting when you explain the safety reason, especially if you offer to patch and repaint when you leave.
Adhesive Cabinet Locks: The First Line Against Cleaning Products
My younger daughter once cleared out the entire under-sink cabinet in the time it took me to answer the doorbell. I’m talking bottles of dish soap, drain cleaner, and a container of dishwasher pods on the floor before I made it back to the kitchen. After that, I tested six different adhesive cabinet locks across our kitchen and bathrooms. Four held reliably for over a year. One failed on a slightly textured cabinet surface within three weeks. One I’d call marginal.
This experience aligns with documented safety data. America’s Poison Centers reported 87,000 cases of children under 6 exposed to household cleaning products in 2024, the largest substance category for that age group. Cabinet locks are not a convenience item.
For adhesive locks to hold, the surface has to be clean, dry, and smooth. Wipe the cabinet face with isopropyl alcohol before applying. Let it dry completely. Then wait the full cure time before testing, usually 24–72 hours depending on the product. Once cured, pull hard. If it gives, it wasn’t going to hold a toddler either.
Test the locks monthly. Children grow fast, and a 14-month-old applies very different force than a 22-month-old. If a lock feels loose, replace it.


Corner Guards and Edge Bumpers: Monthly Inspection Is Non-Negotiable
Corner guards are one of the easier wins in the no-drill category. Most use a peel-and-stick foam or silicone backing, and they install in seconds. The problem is that "installed" and "staying installed" are two different things.
In warm climates, in rooms with direct sun exposure, and in high-traffic areas where furniture gets bumped regularly, adhesive corner guards can start peeling within a few weeks. A peeled corner guard is a choking hazard and creates a false sense of security.
Inspect every corner guard and edge bumper once a month. Press each one firmly. If any edge lifts, replace it. Clear guards on coffee tables and hearths deserve extra attention because they’re harder to notice when they start to go.
For particularly high-traffic pieces, like a glass coffee table your toddler uses as a support to stand up, consider whether a no-drill product is the right tool. Sometimes the honest answer is to move the furniture.
Outlet Covers: Adhesive vs. Pressure-Fit
Standard plug-in outlet covers work fine for infants and young toddlers. For older toddlers who’ve figured out that the little plastic thing pulls out, adhesive-backed sliding plate covers are more tamper-resistant. They replace the outlet cover plate entirely and require a deliberate two-step motion to open, which most children under 3 can’t coordinate.
When choosing outlet covers, look for products that meet current UL electrical safety standards. The packaging should state compliance explicitly.
One practical note: adhesive outlet covers are harder to remove and reinstall repeatedly, so think about which outlets you use daily before committing. A cover on an outlet behind a heavy piece of furniture is a different calculation than one at toddler eye level in the living room.
-
Clean the surface
Wipe with isopropyl alcohol and let dry before applying any adhesive product. -
Apply and wait
Install the product and observe the full cure time, minimum 24–72 hours. Do not test early. -
Apply real force
Push or pull firmly in the direction a child would. A gentle tug is not a valid test. -
Inspect monthly
Check every product on a set schedule. Replace anything that feels loose before it fails. -
Replace on schedule
Adhesive door and humidity-area products typically need replacement every 6–12 months.
Furniture Anchors Without Drilling
Furniture tip-overs from dressers, bookshelves, and televisions injure thousands of children annually. This is one of the hazards where renters sometimes feel stuck, because the most reliable anchors require wall studs and screws. But strap-based and adhesive anchor systems exist, and some are effective when used correctly.
The key word is "rated." Any furniture anchor you use should list a weight rating, and that rating should exceed the weight of your specific piece of furniture by a meaningful margin. If your dresser weighs 80 pounds, don’t buy a strap rated for 80 pounds. Look for one rated for at least 150–200 pounds. The extra capacity accounts for the dynamic force of a child pulling on an open drawer, which is much higher than the static weight of the furniture.
Adhesive furniture anchors attach to the back of the furniture and to the wall surface. On drywall, the bond strength depends entirely on the paint and wall texture. Test the bond before relying on it. Apply the anchor, wait the full cure time, and apply steady, firm pressure before you consider it active. If your walls are textured or have multiple layers of old paint, a strap-and-stud mount is the safer choice, even if it means a small hole to patch later.
Door Locks and Handle Covers
Adhesive door locks and handle covers are useful for bathrooms, laundry rooms, and any door that leads somewhere a child shouldn’t go unsupervised. They install without tools and come off without damage when removed correctly.
The limitation is longevity. Adhesive door products typically need replacement every 6–12 months under regular use. The bond weakens from the repeated stress of the door opening and closing, and from the moisture that accumulates near bathroom doors. Build a replacement schedule into your routine rather than waiting until one fails.
Handle covers that fit over lever handles are particularly useful because lever handles are easy for toddlers to operate. A round knob cover that requires squeezing while turning is much harder for small hands to manage.
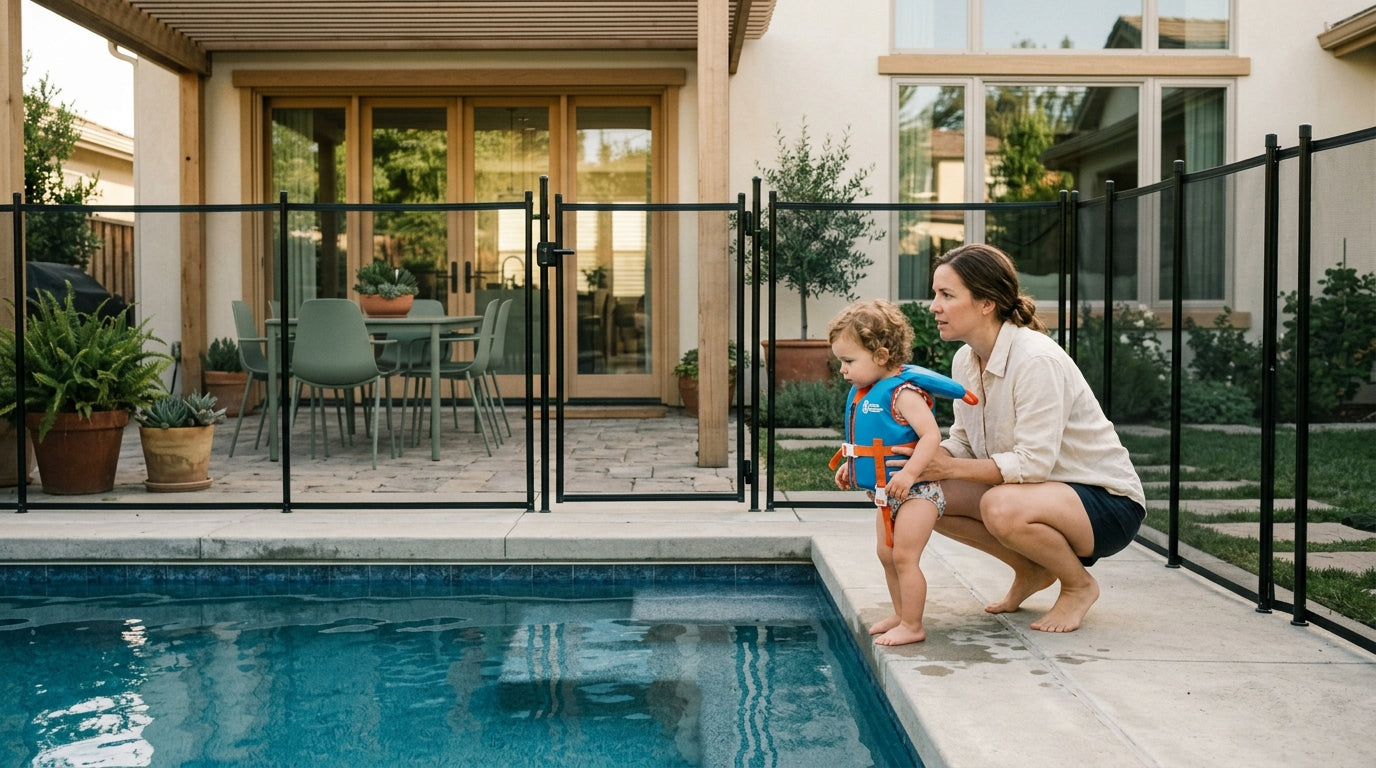
Window Safety: Egress Is Not Optional
Removable window guards and adhesive window locks are available and can add a meaningful layer of protection against falls from upper-story windows. But before you install any window safety product, read the building code for your city and the lease terms for your unit.
Any window guard or lock must allow for emergency egress. This is a building code requirement in most jurisdictions, and it’s also just common sense. A product that prevents your child from falling out of a window should not also prevent your family from escaping a fire. Look for guards with quick-release mechanisms, and make sure every adult in the home knows how they work.
Adhesive window locks that limit how far a window can open are generally simpler and less restrictive than full guards. They’re also easier to install and remove. For most standard windows in a rental, a window stop that limits opening to 4 inches is a practical, code-compatible solution.
No-Drill Babyproofing Checklist
High-Humidity Areas: Where Adhesive Fails
Bathrooms near the sink, the area around a kitchen sink, and laundry rooms are where adhesive products fail most often and most quietly. Humidity softens adhesive bonds over time. A cabinet lock that held firmly for three months in a dry kitchen may peel away in six weeks under a bathroom vanity.
For these areas, pressure-fit products are more reliable than adhesive ones. If a pressure-fit option doesn’t exist for the specific hazard you’re addressing, check the adhesive bond weekly rather than monthly. And consider whether a hardware-mounted option is worth the small repair cost when you move out.
Testing Before Trusting
This is the step most parents skip. Don’t.
Apply the product to a test surface, or to the actual surface if you’re committed to the location. Wait the full cure time listed on the packaging, which is usually 24–72 hours. Then apply firm, sustained pressure in the direction a child would push or pull. Not a gentle tug. Real force.
In my experience, I installed an adhesive strap lock without waiting the full cure time or testing it under load. A toddler opened it in about 40 seconds. After that, I treated the cure time as a hard minimum and tested every product before considering it active.
Removing Adhesive Products Without Damaging Your Walls
When it’s time to move out, or when a product needs replacing, removal matters. Pulling adhesive products off cold and fast is how you take paint with them.
Use a hair dryer on a low setting to warm the adhesive for 20–30 seconds before pulling. Peel slowly at a low angle, parallel to the wall rather than straight out. If residue remains, a small amount of adhesive remover or rubbing alcohol on a cloth will usually lift it without affecting the paint underneath.
Leaving a small amount of residue is better than gouging the wall surface. Most adhesive residue can be cleaned. A gouge in drywall requires patching and repainting, which is exactly what you were trying to avoid.
Used correctly, adhesive and pressure-mount products can cover most hazards in a typical home. Used carelessly, they create a false sense of security. Test everything. Replace on schedule. Know the two places where no adhesive product substitutes for hardware: the top of the stairs, and anywhere the bond is failing.