How to Baby Proof Door Handles: Lever vs. Knob Solutions

Every door in your house is a decision point. Some lead to safe spaces. Others open onto staircases, garages, cleaning supplies, and pools. The hardware on those doors is the only thing standing between your toddler and whatever is on the other side.
U.S. emergency departments treated a child for a door-related injury roughly every 4 minutes across the decade from 1999 to 2008 (NEISS analysis, Clinical Pediatrics). Roughly 4 in 10 of those visits involved children age 4 or younger. Most parents think about doors in terms of slamming and pinching. But the handle itself is its own hazard category, and the type of handle you have changes the solution you need.
Why Lever Handles Are a Different Problem Than Knobs
A round doorknob requires two coordinated movements: grip and rotate. That combination demands a level of fine motor control that most children don’t develop reliably until around age 3, sometimes later. A lever handle requires neither. A child can depress a lever with an open palm, a forearm, or even a forehead. In my experience, children can figure out lever handles as early as 22 months by simply leaning into them.
That physical difference is the core of why lever and knob solutions aren’t interchangeable. Knob covers exploit a developmental gap. Lever locks have to physically block a motion that almost any child can perform.
This matters when you’re shopping. A cover designed for a knob won’t transfer to a lever. And a lever "cover" that just adds bulk without blocking the depression mechanism is nearly useless against a determined toddler.
How Knob Covers Work, and Where They Fall Short
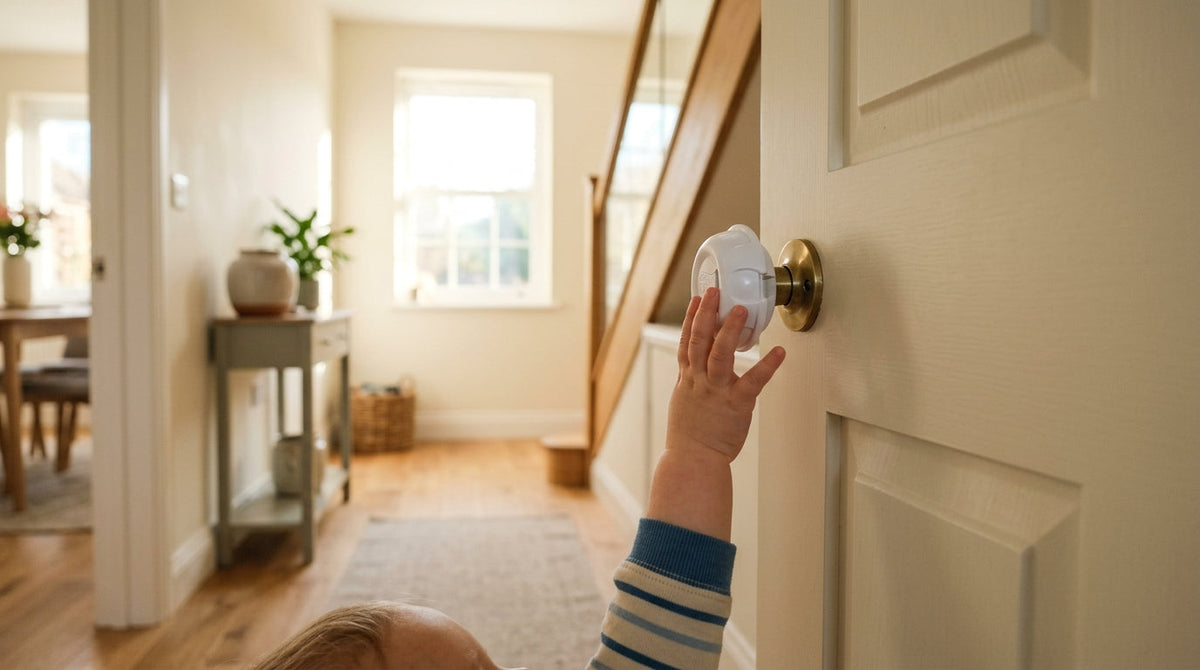
Round knob covers come in two main styles. Slip-on covers are the most common: a plastic shell fits over the knob and spins freely when a child grabs it, so the child can’t generate the grip-and-twist motion needed to turn the knob underneath. Locking covers add a release button that an adult must press before the cover will engage the knob. Both styles rely on the child failing to coordinate multiple motions simultaneously.
That’s a reasonable bet for most toddlers. But it’s not a guarantee. Covers that fit loosely can be pulled off entirely. Covers on knobs with worn finishes or unusual shapes may not seat snugly. In my experience testing covers from several brands, roughly one in six didn’t create a firm enough fit on oil-rubbed bronze knobs. The cover rotated, yes, but it also wobbled enough that a persistent child could have worked it free.
The CPSC’s childproofing guide recommends door knob covers and door locks to help keep children out of rooms with possible dangers, and it cautions that no device is completely childproof. For doors to bathrooms, kitchens, laundry rooms, and garages, treat a cover as a first line of defense, not the only one: a screw-mounted lock is the stronger choice.


How Lever Locks Work, and Why They’re Generally More Effective
Lever handle locks use a physical barrier rather than a coordination barrier. Most designs attach above or below the lever and include a latch or sliding mechanism that prevents the lever from being depressed until an adult releases it. The child can push on the lever all they want. It doesn’t move.
This is a meaningful distinction. Knob covers require the child to fail at something. Lever locks don’t give the child anything to succeed at. That’s why, for high-risk doors with lever hardware, a purpose-built lever lock is almost always the better choice.
The tradeoff is installation. Lever locks need to be positioned so a child cannot reach around or under the blocking mechanism to depress the lever from an angle. A lock mounted too loosely, or too far from the lever’s pivot point, can still allow partial depression. When I installed a push-down latch style lock on our back door, I had to reposition it twice before it fully blocked the lever at every point of contact. Read the fit instructions for your specific handle dimensions before you buy.
-
Clean the surface
Wipe the handle plate with isopropyl alcohol and let it dry before applying any adhesive. -
Check the fit before committing
Test the cover or lock against your specific handle shape and dimensions before removing the adhesive backing. -
Apply firm, even pressure
Press adhesive mounts for the full time specified, usually 30 seconds, across the entire contact surface. -
Test like a toddler
Push from below, pull from the side, and probe for gaps. If you find a weakness, reinstall or switch to screw mounting. -
Check weekly for the first month
Adhesive can shift in the first few weeks. Any movement means it needs to come off and be reapplied.
Installation Quality Is the Variable That Decides Everything
The best lock on the market fails if it’s installed poorly. This applies to both knob covers and lever locks, and it’s the thing most buying guides skip over.
Adhesive-mounted hardware is the most common option for renters or anyone who doesn’t want to drill. It works well on smooth, flat surfaces. It fails on textured finishes, curved handle plates, and surfaces with any residue or moisture. Clean the surface with isopropyl alcohol and let it dry fully before applying. Even then, check adhesive hardware weekly for the first month. If there’s any give, it needs to come off and be reapplied or replaced with a screw-mounted option.
Screw-mounted covers and lever locks are more permanent and more reliable. They require drilling and landlord approval in rental situations, but they don’t shift over time and don’t depend on adhesive bond strength. For any door leading to a hazardous area, screw mounting is worth the extra step.
Whatever you install, check the fit immediately after installation by trying to open the door yourself as if you were a toddler. Push from below. Pull from the side. Try to slip a finger into any gap between the cover and the knob. If you find a weakness, the child will find it faster.
Combination Approaches for High-Risk Doors
For doors to garages, basements, exterior spaces, or anywhere with water or chemicals, a single cover or lock isn’t enough. Use a lever lock or knob cover on the handle itself, and add a door stop or security bar at the base to prevent the door from swinging open even if the handle lock is somehow bypassed.
Door handle hardware on exterior doors and pool gates deserves its own category. Drowning is the leading cause of unintentional injury death in children ages 1–4 (CDC). A pool gate latch that a toddler can defeat is a critical failure, not a minor inconvenience. For those doors, use high-security locks mounted above the child’s reach, at a minimum 54 inches from the ground, in addition to any handle hardware. Pool gates should also open outward, away from the pool, and be self-closing and self-latching, as the CPSC’s pool barrier guidelines advise.
For interior doors to already child-proofed spaces, a basic knob cover or lever lock is sufficient. The risk calculus is different when the worst outcome on the other side is a crayon on the carpet.
Magnetic and Electronic Options
Magnetic locks and electronic push-button locks are increasingly common in households with multiple caregivers. Magnetic systems use a hidden latch that only releases when a paired magnetic key is held near the mechanism; they need no batteries. Electronic locks use keypads or app controls. Both allow hands-free operation for adults who know the system.
The tradeoff is maintenance. Electronic locks require batteries, and a dead battery on a cabinet or door lock means either the lock fails open or it fails locked, depending on the design. Test battery-dependent locks monthly. Keep spare batteries in a location that’s itself secured, since button batteries are a serious ingestion hazard for young children.
For households with one or two consistent caregivers, passive locks, mechanical or magnetic-key, are simpler and don’t introduce a failure mode that requires a charged battery. Magnetic and electronic options suit larger households where multiple adults need seamless access without fumbling for a key or pressing a release button.
Door Safety Checklist
Monthly Testing and When to Replace
Hardware degrades. Adhesive weakens. Screws loosen. Plastic components become brittle or sticky with temperature changes. A cover that was snug in October may have shifted by February.
Test every lock and cover monthly. Try to open it the way a child would: grab the knob cover and pull, not just twist. Push the lever lock from multiple angles. Look for any visible gap between the cover and the door hardware. If a screw has any play, tighten it. If an adhesive mount has shifted even slightly, remove it, clean the surface, and reinstall.
Replace any cover or lock that has cracked, yellowed significantly, or lost its snap-fit tension. These are not expensive components. Replacing a $6 knob cover is a much smaller problem than the alternative.
In my experience, a missed battery check on an electronic lock can result in a child accessing a hazardous space in minutes. Monthly testing is essential.
At what age can children open lever handles?
Will a knob cover work on an oil-rubbed bronze or unusual finish?
Can I use adhesive-only hardware on a rental property?
How often should I replace door safety hardware?
Do I need a lock on my child’s bedroom door?
Matching the Solution to the Door
Not every door needs the same level of hardware. A quick framework:
- Exterior doors, garage doors, basement doors, pool gates: High-security lever locks or deadbolts mounted above child reach, plus handle hardware. No adhesive-only solutions.
- Bathroom, kitchen, laundry room doors: Lever lock or locking knob cover, screw-mounted where possible. For these rooms, a lock is stronger than a cover alone.
- Interior doors to child-proofed rooms: Basic slip-on knob cover or standard lever lock is sufficient.
- Doors children need to open themselves (their bedroom, playroom): No lock needed, but consider a pinch guard on the hinge side.
The hardware you choose matters less than the fit, the installation, and the follow-through. A lever lock that’s checked monthly and installed correctly on a hazardous door is worth more than three different products installed loosely and never tested again.